In the late 1970s I was bought some Hornby model railway buildings but even at age 8 I knew that the mouldings and detail were not that great. Looking at my 1980 catalogue (yes I still have it – the one where the dads featured in it either look like Peter Sutcliffe or one of the villains from The Sweeney) I can see that I had accumulated a signal box (R.503); engine shed (R.504); water tower (R.505); goods shed (R/506); and the station set (R.593) consisting of a booking hall and separate waiting room.
The Hornby designs were not based on any particular building and were in fact brickwork patterns printed directly onto beige plastic mouldings. At the time I lived not far from the preserved Hadlow Road station in Willaston (Wirral) and the working lines out of Chester – so the Hornby designs seemed to be too much like a toy. To be fair, Hornby were in the market for making toys, but they looked like this:

The Hornby railway buildings from the 1970s and 80s were quite basic.
The first thing I tried to do in about 1982 – pimp attempt #1 – was to apply paint. The top of the water tower received a coat of grey and cream; the goods shed some maroon gable ends as did the station buildings and the signal box. Chimneys were painted brown and terracotta, doors were coloured black and white and in an attempt to jazz everything up a bit more, I went overboard in applying old fashioned advertisements. After hand sanding and grey washing the platforms to rough them up, adding a couple of hand-made Leominster signs and painted seats and I was pretty content. Together with a mixture of Mainline and Hornby locos, coaches and wagons, this early BR set would remain boxed up and stored away until June 2022.
-
- First attempt in 1982 to paint the Hornby buildings.
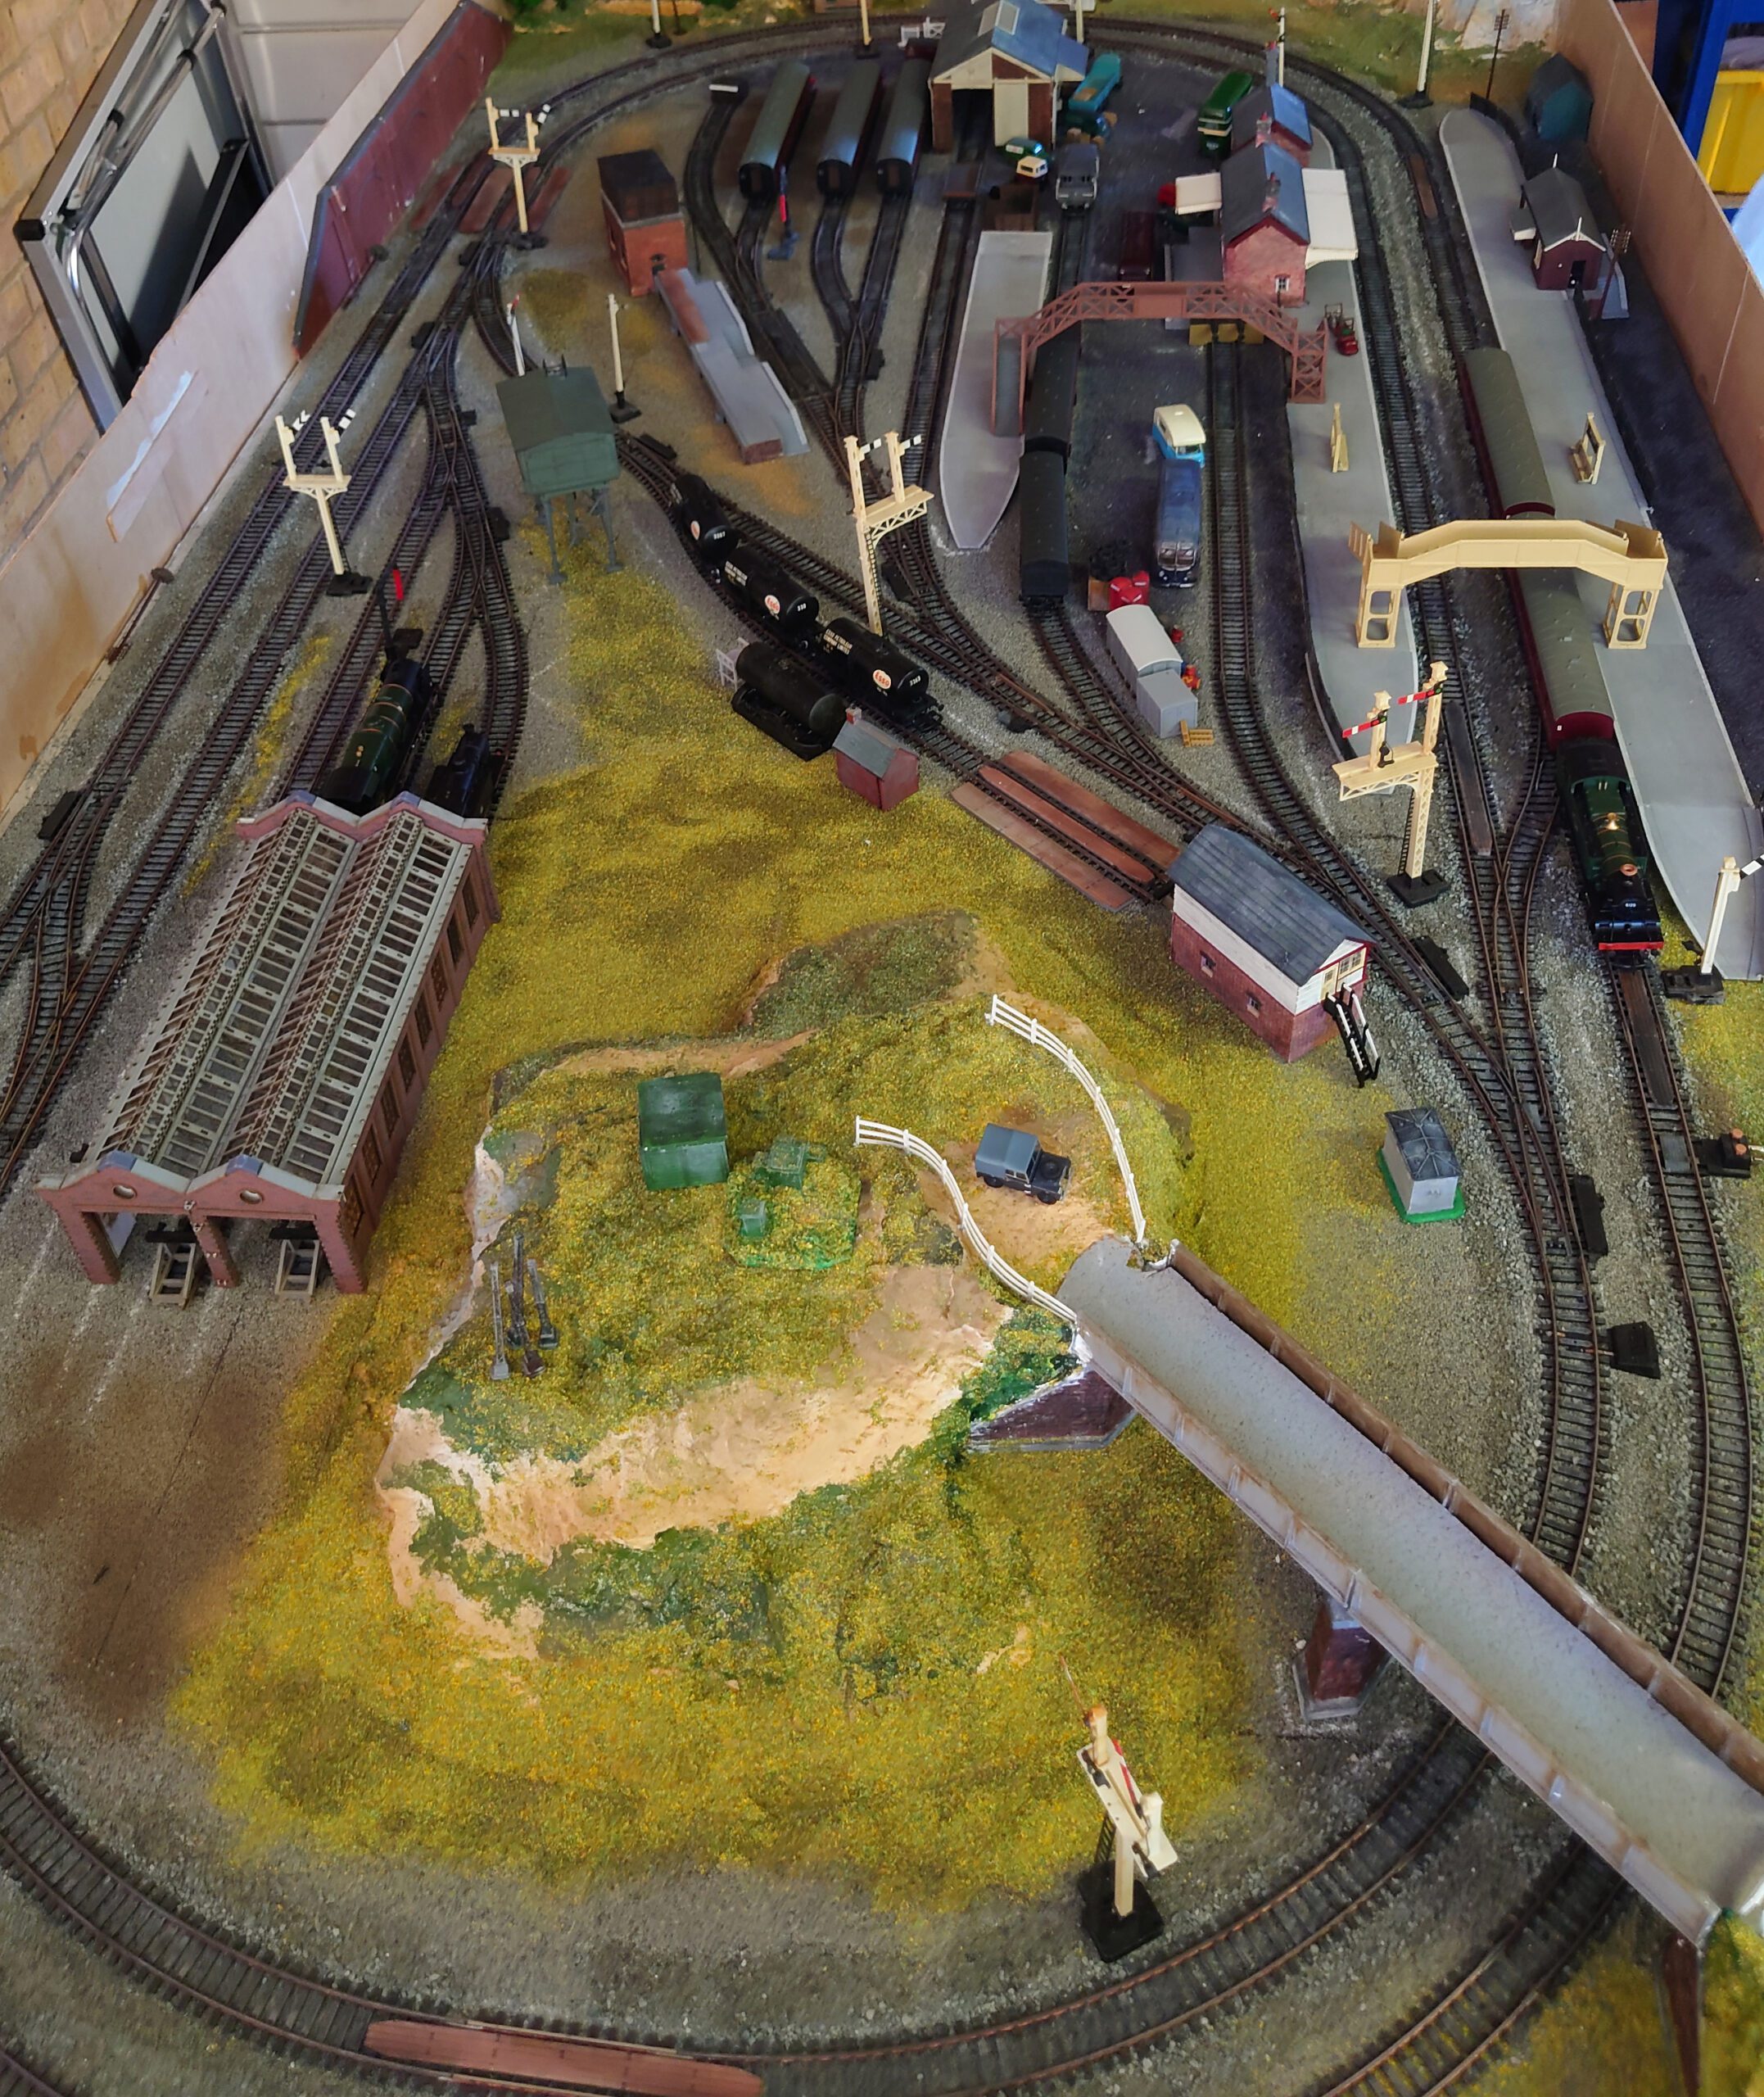
I suspect that it was during the lockdowns of 2020-21 the idea to revamp my old railway began to germinate. I was starting to sell some old toys and was about to do the same with the Hornby buildings until I got the idea to have a go at some customisation and take the old layout into the last days of steam – the mid-1960s – and to weather, date, distress and age everything and create a fictitious station and goods yard called Saltney Junction (based on the lines out of Cheshire, the Midland and Wales through Chester). The look and feel would be very season 1 of Endeavour.
Having not picked up a modelling brush or tube of glue in about 40 years, I got to work. What was meant to just reworking the old Hornby buildings a second time soon got way out of hand.
Water tower and signal box
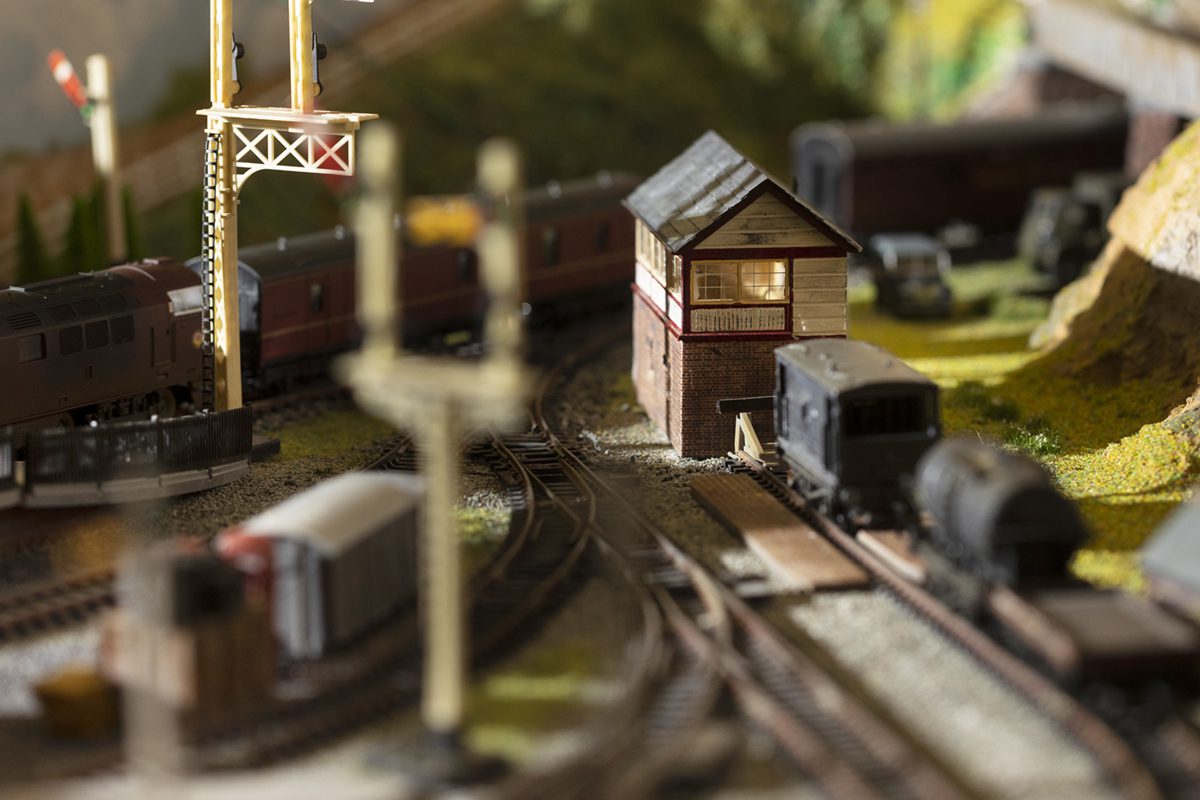
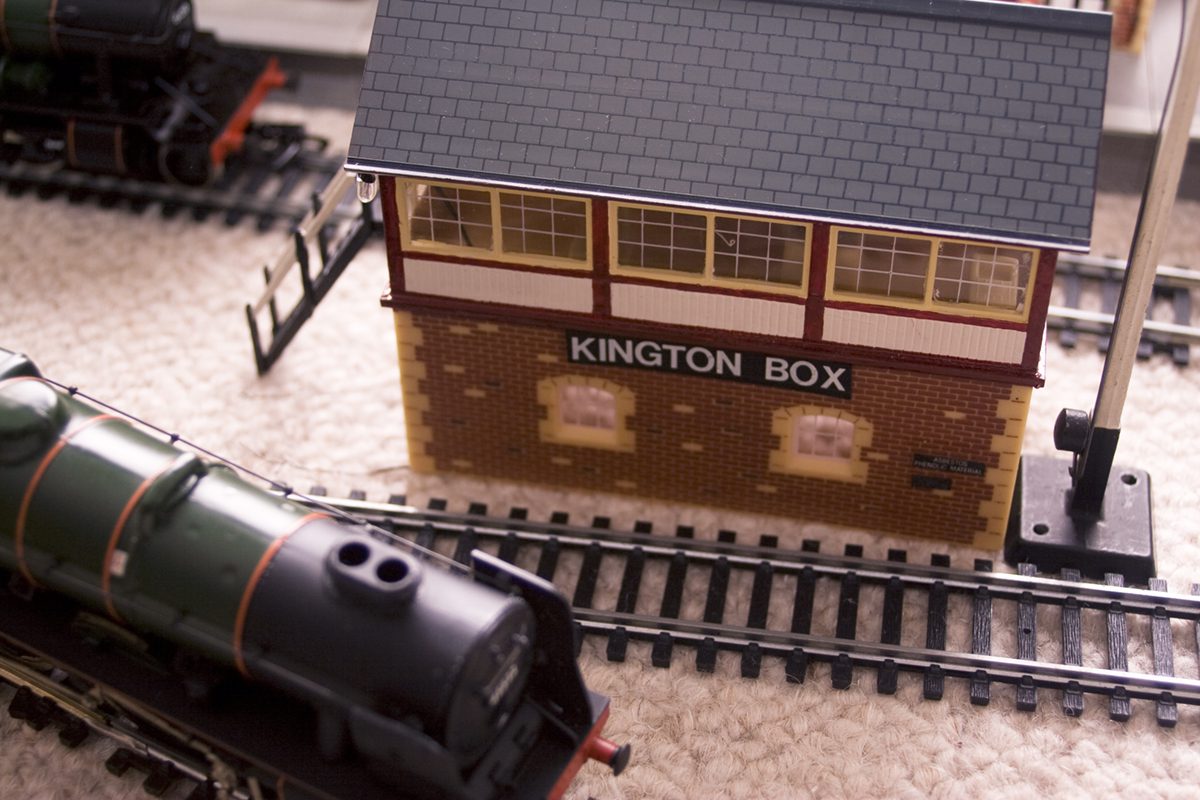
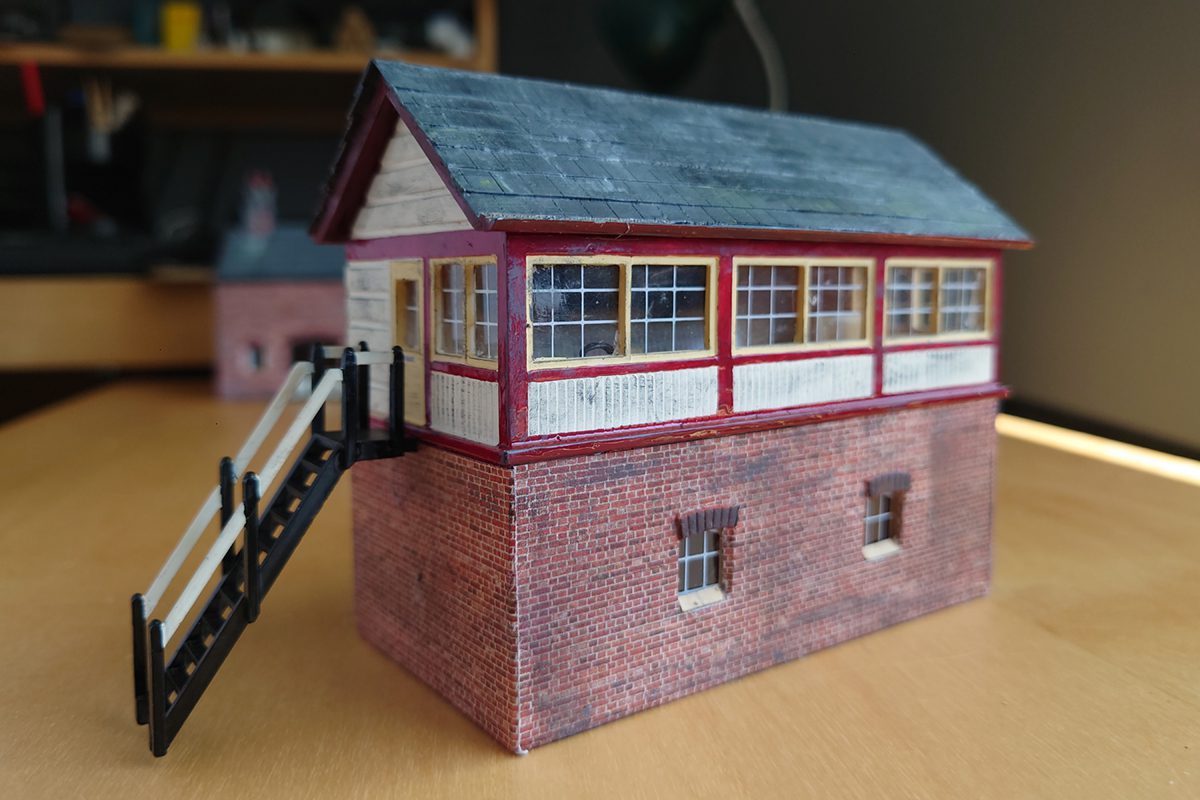
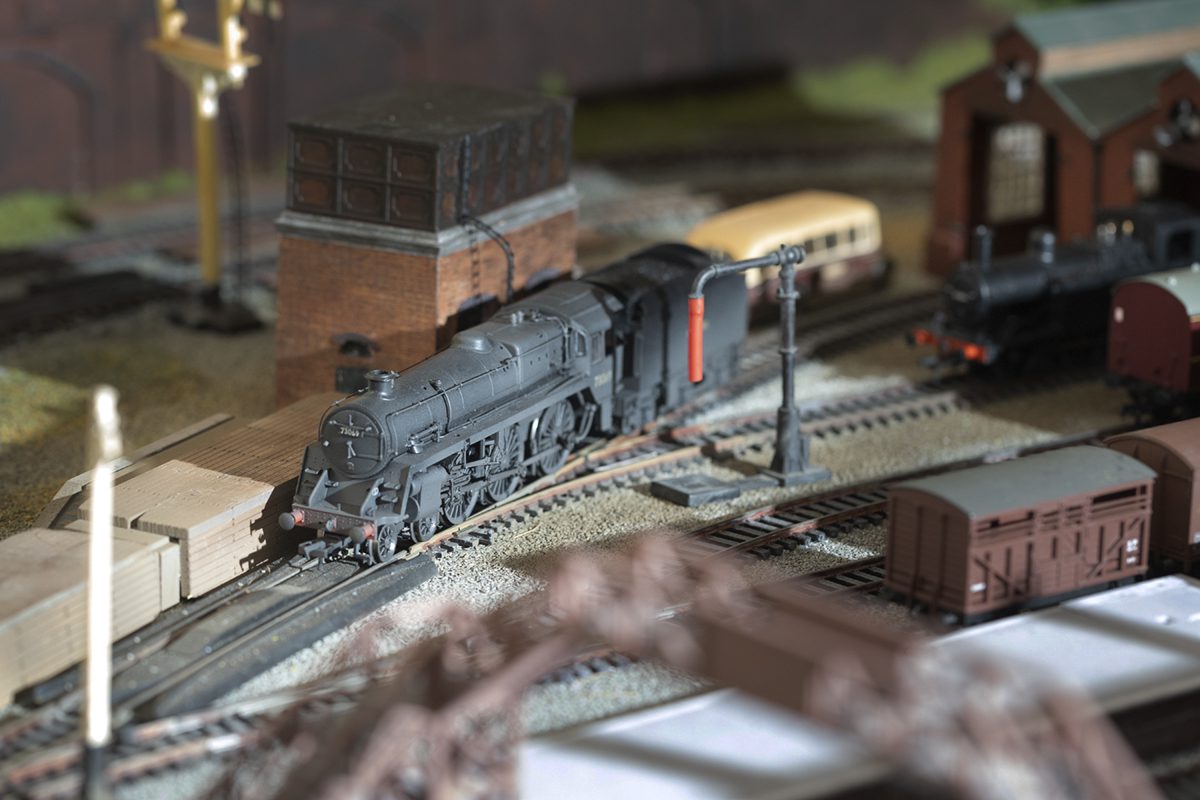
The water tower was to be the test bed for everything else. I applied paper bricks and then weathered them. The Hornby plastic printed windows were replaced with framed windows. Edge or decorative bricks were added to the tops of the windows and the stone cap stones painted in and weathered with a slight texture applied by adding self-raising flour to the wet paint. Finally, the water tank at the top was rusted and weathered. So far, so good. The signal box also had paper bricks glued on to it and by this time I experimented with adding separate slate roof tiles which were painted and then weathered (moss, lichen and a bit of bird poo). I left the Hornby windows intact but added decorative bricks above and added some angled window sills.

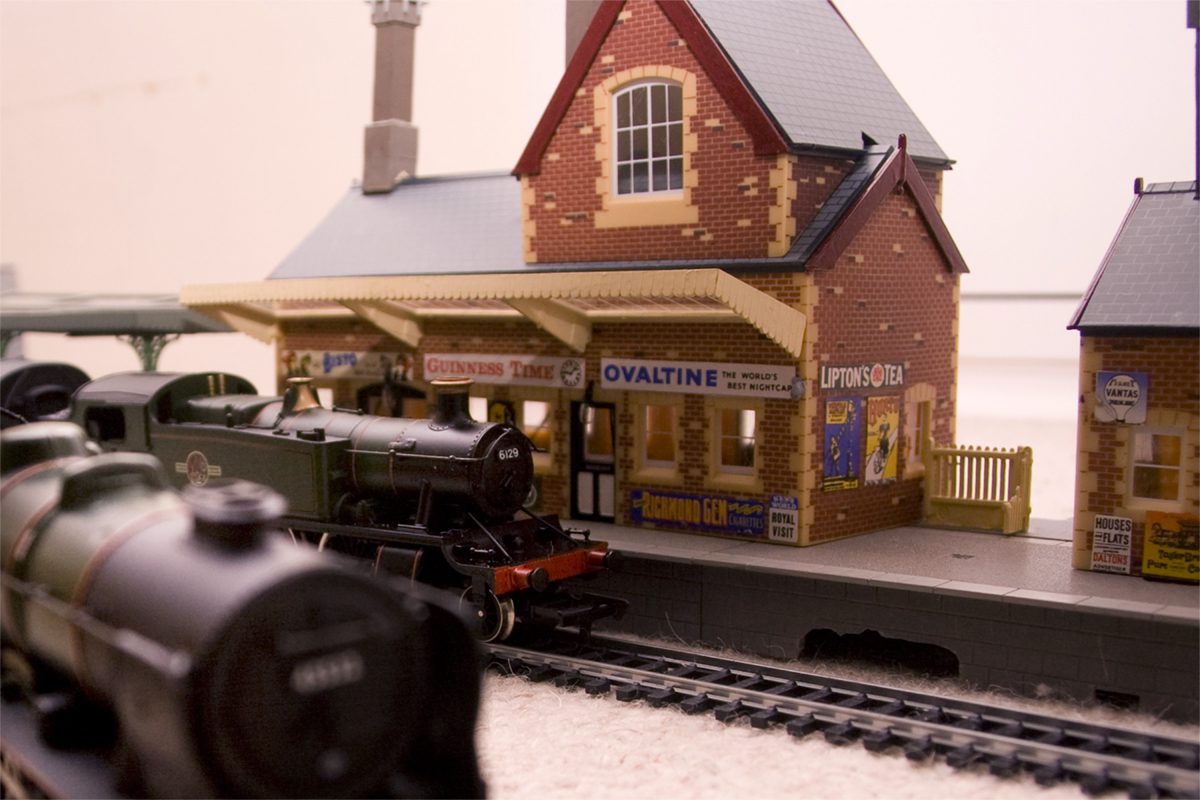
Station buildings
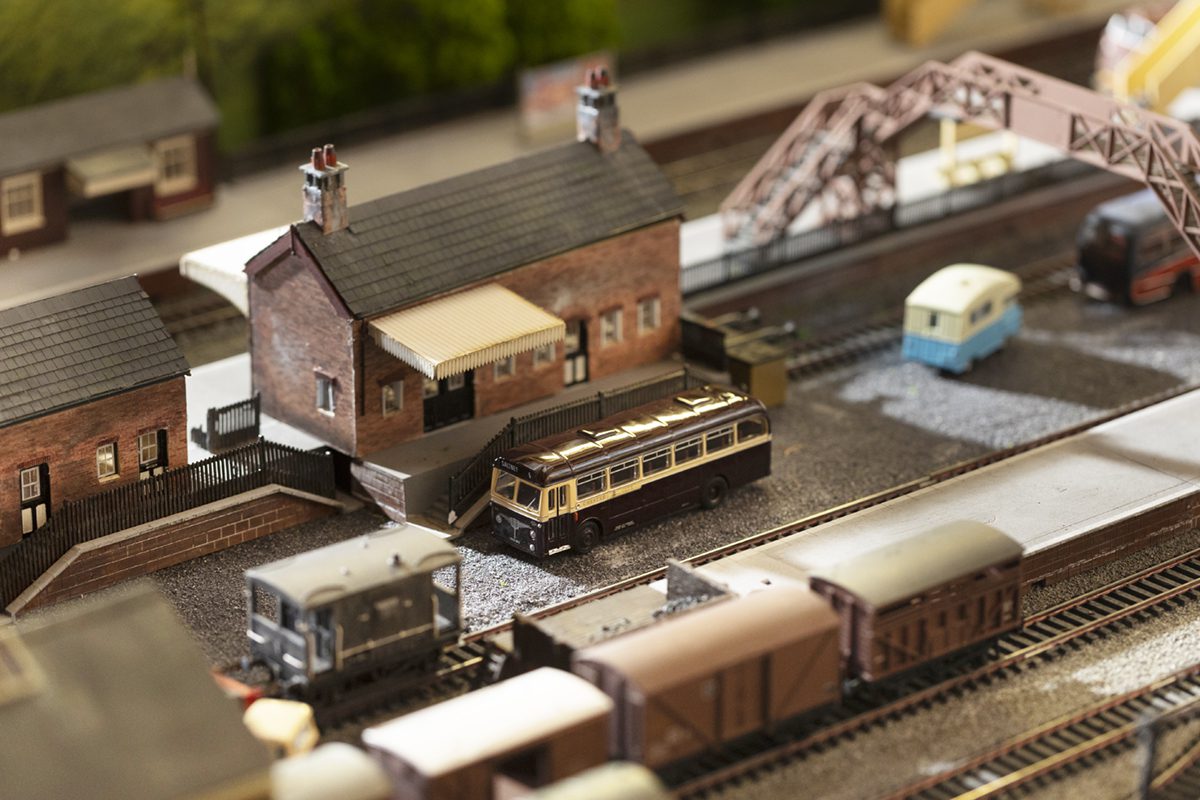
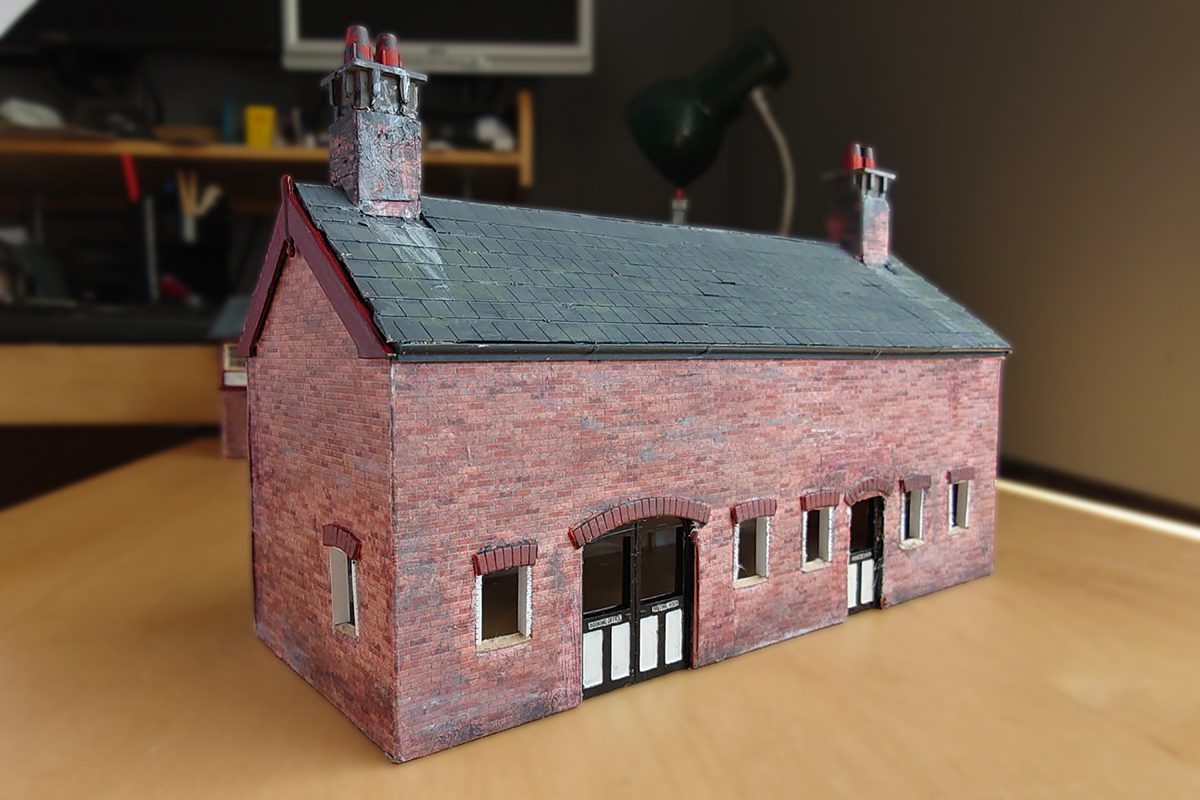
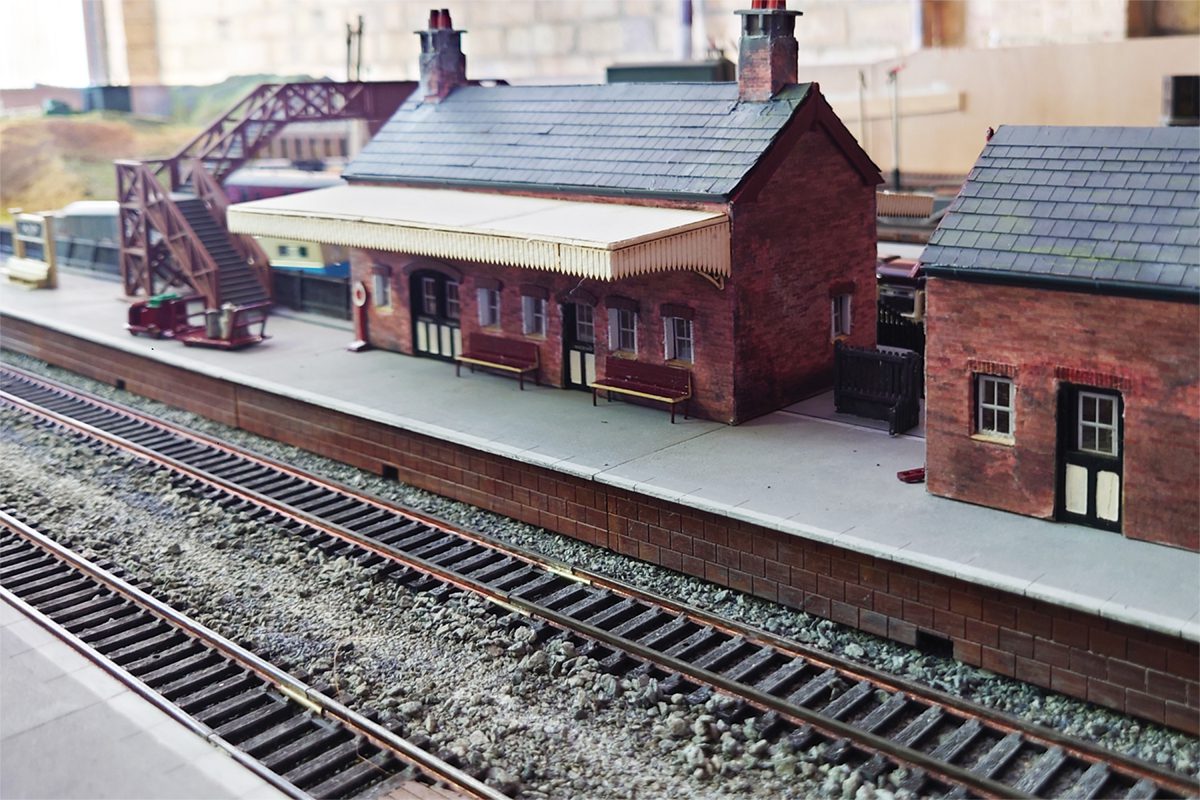
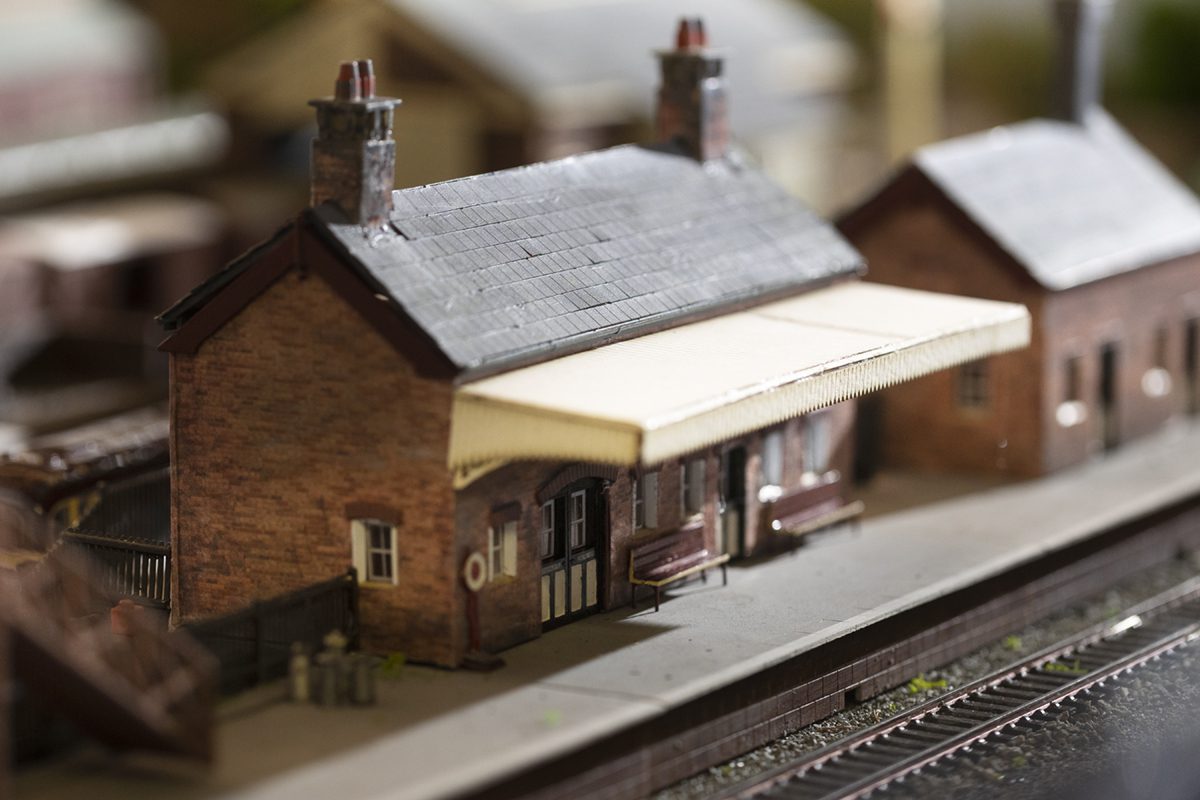
The same roof tile effect as the signal box were added together with the window bricks, sills and frames. With the main booking hall, the chimneys were cut down and the Hornby middle section excluded to make it more in keeping with a small rural station.Windows and a new balsa wood canopy were to be added later.
-
- Customising the Hornby booking hall by cutting chimneys and adding a balsa canopy.
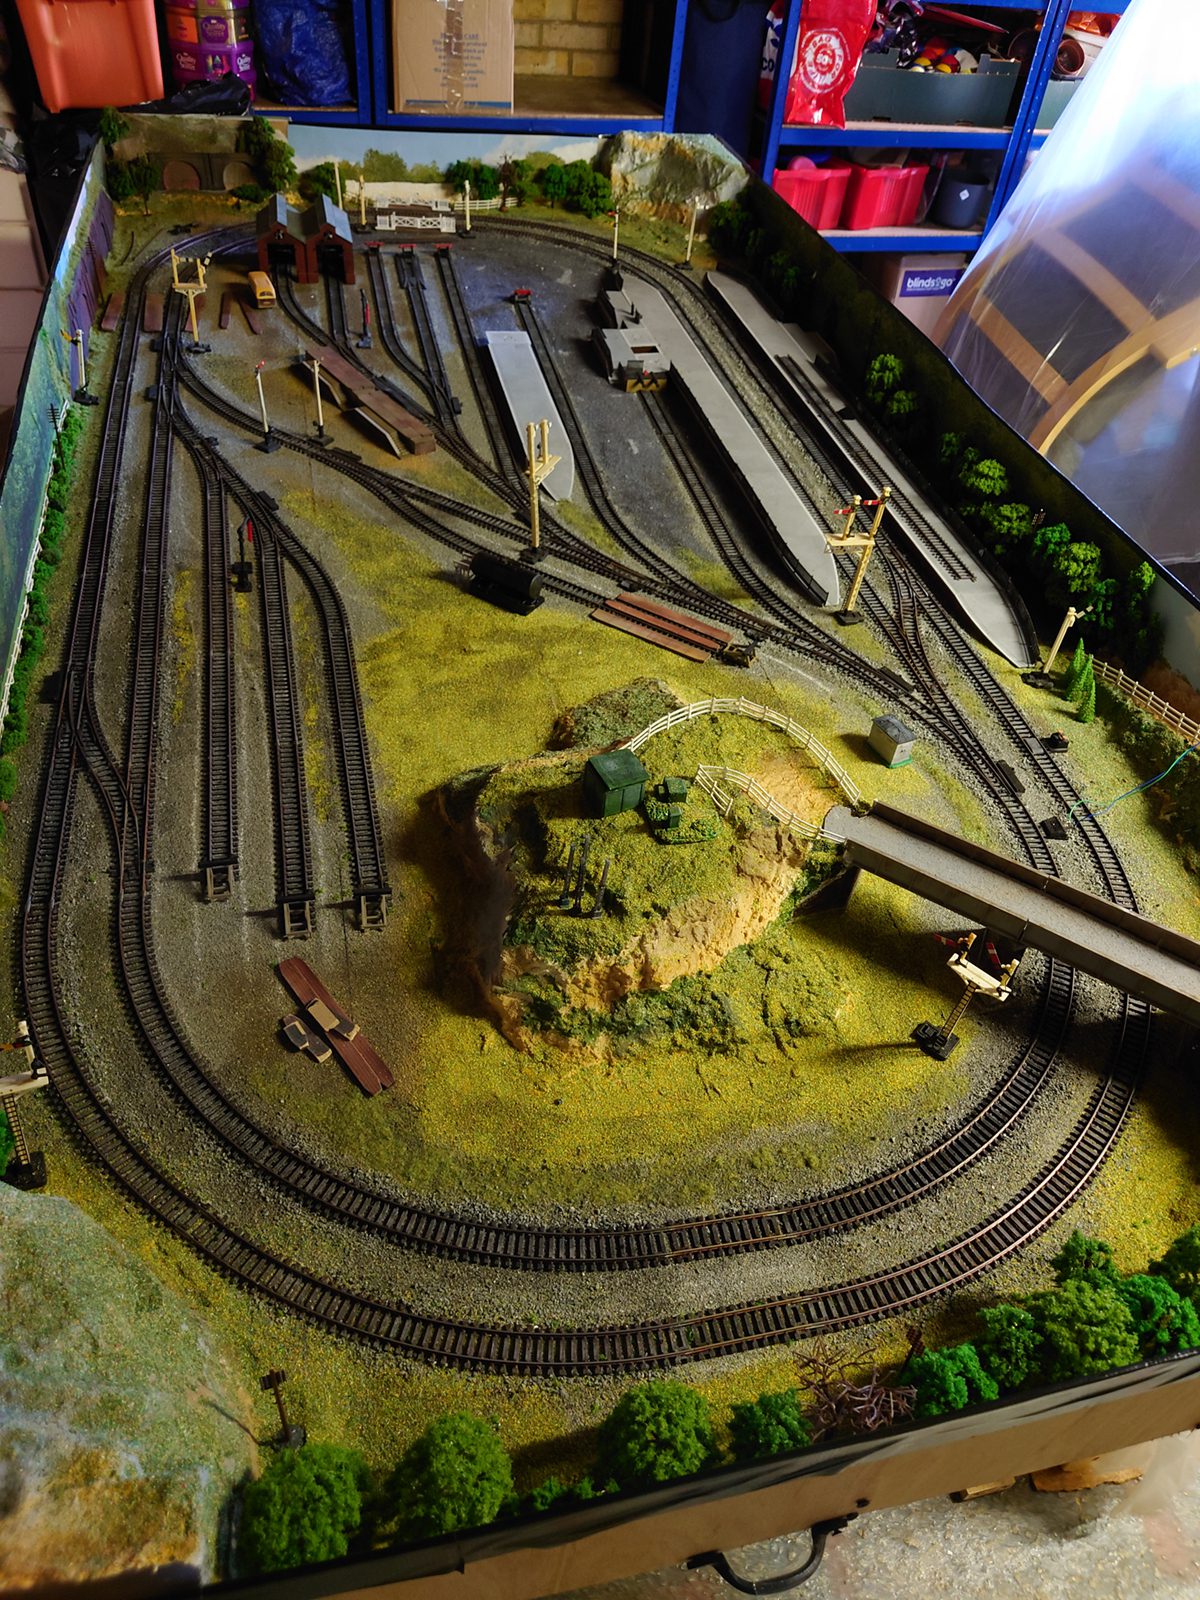
The problem I now had was that in order to make a junction needed to add more track, platforms and start to think about more than one siding. The Hornby engine sheds now looked completely wrong against the weathered buildings. I was going to need a bigger boat.
New layout – intensive 2 month build
I have never made a layout in my life. The limits of my imagination as I child were set by what I was able to put down on the living room carpet and then pack away again.
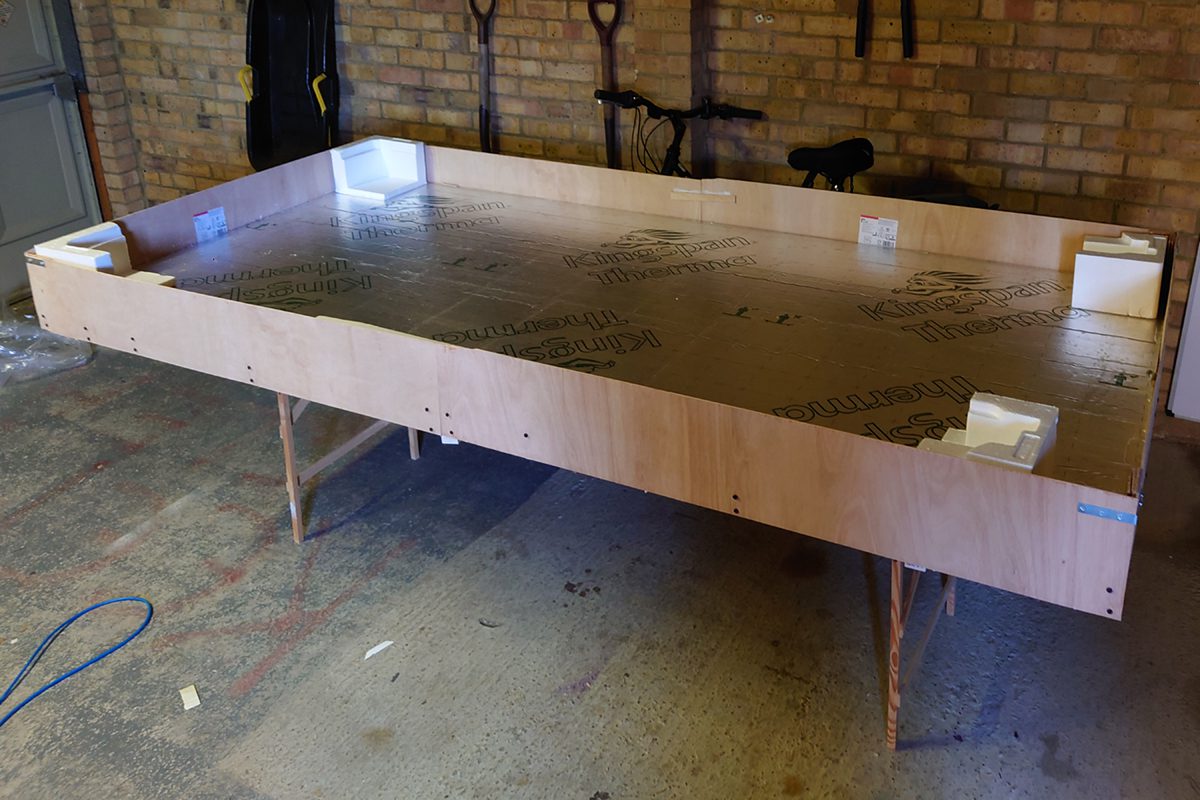
The initial limiter this time around was garage storage (and construction) space. I had worked with 8 x 4 poly-boards or insulation boards before and thought that it would form a lightweight but sturdy base allowing for wires to be placed through it. You could just about fit in twin track curves, short straight and some sidings with that size. I drilled and glued supporting strips of wood to the insulation base to make a rough light weight frame and then added sides to it made from plywood. The corners were held with brackets. A gap was left between the underneath wooden supports so that a decorating trestle table could fit in the slot for whole thing to rest on.
-
- 8 x 4 ft insulating board with plywood sides and a 4″ x 2″ frame.

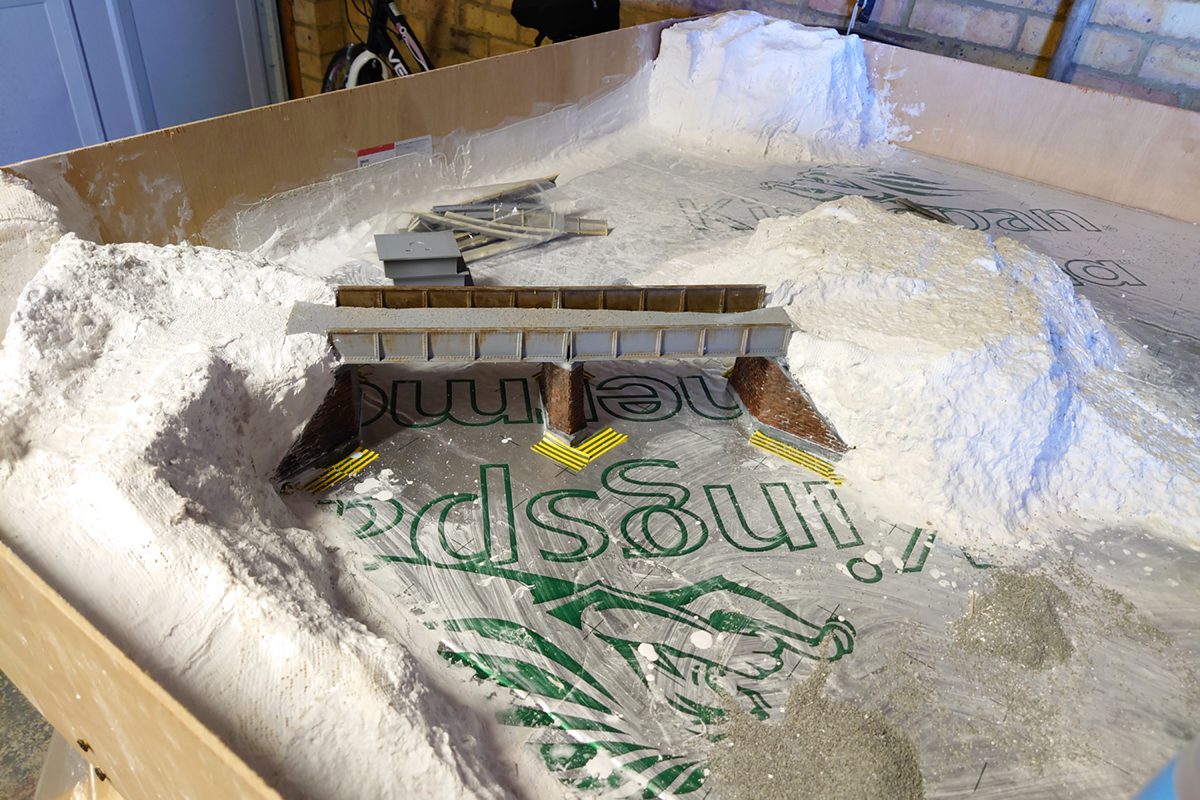
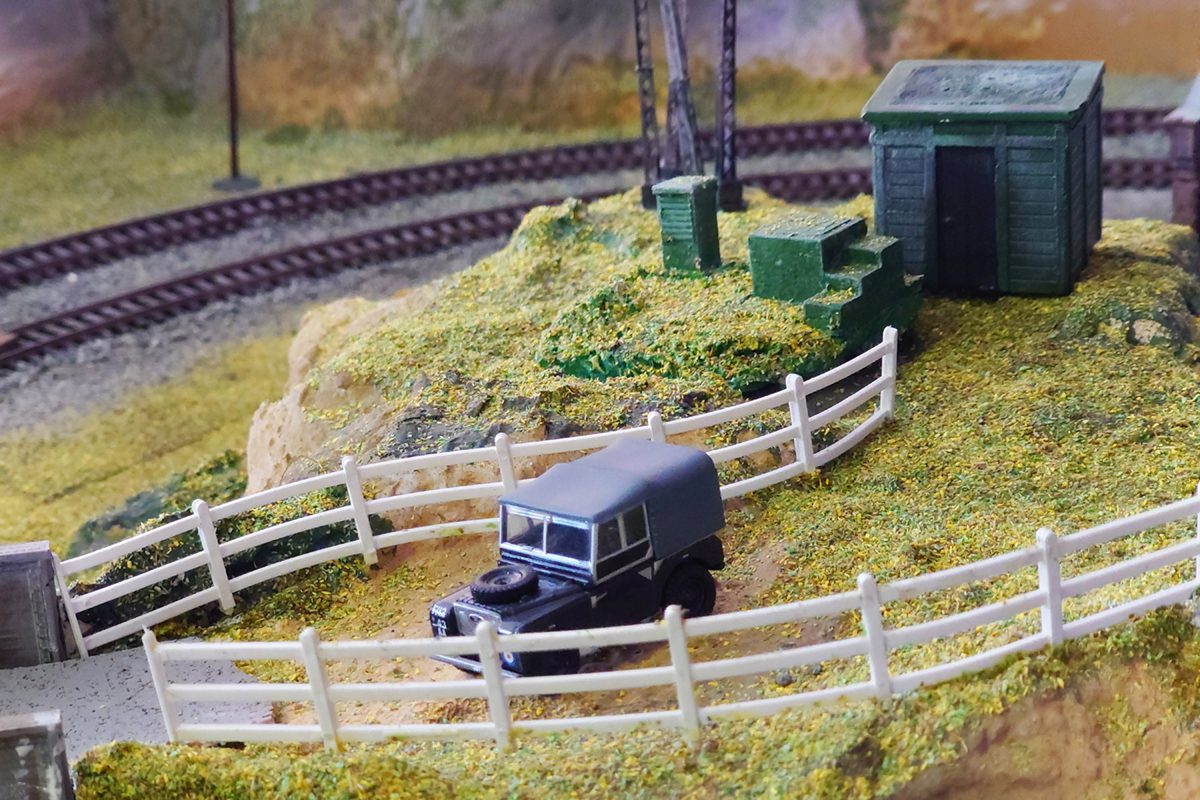
I didn’t want the layout to be completely devoid or vegetation or scenery, so I set about using old pieces of polystyrene packing to create small banks of earth in the corners and a small hill in the centre. Webbing and liquid plaster were used to pack the holes between the polystyrene to build layers and add texture. A base coat of brown and sand spray paint was added to the raised sections and then a mixture of green paints applied with a brush. I also wanted a bridge to join the small hill to one of the banks of earth so I purchased an unfinished plastic kit that I could paint and weather.
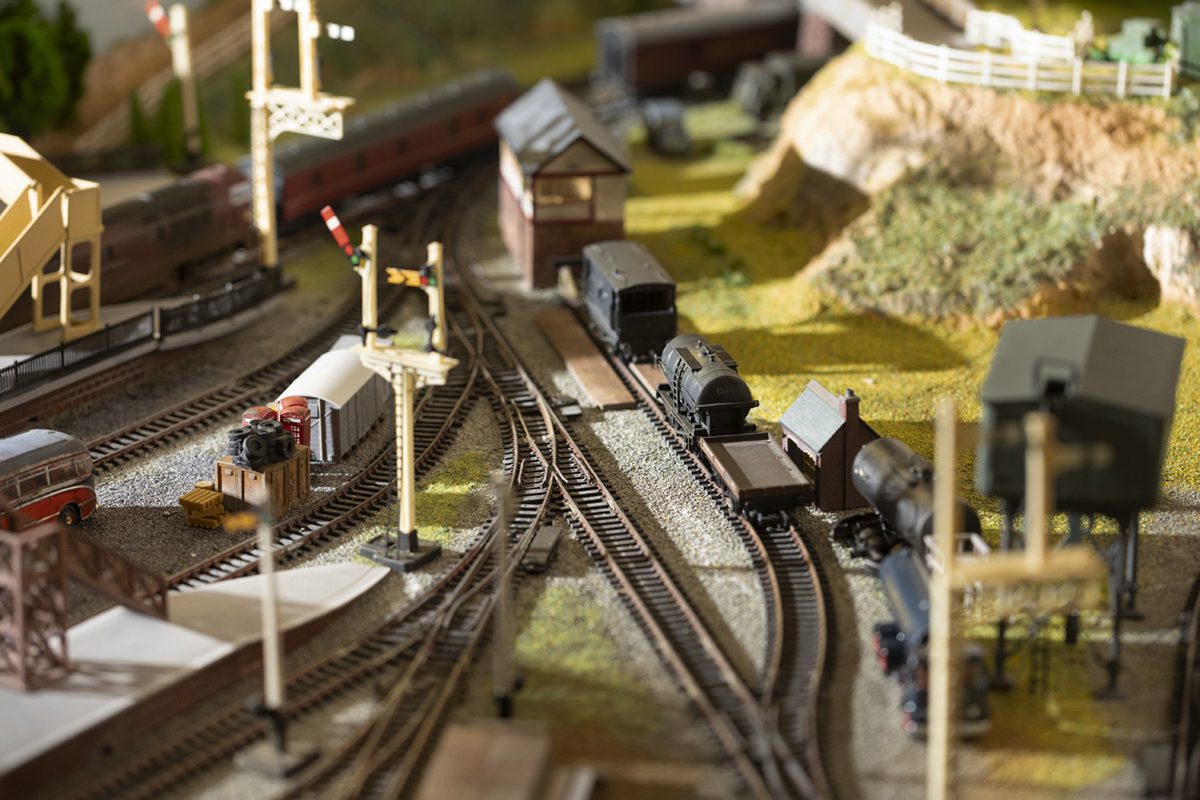
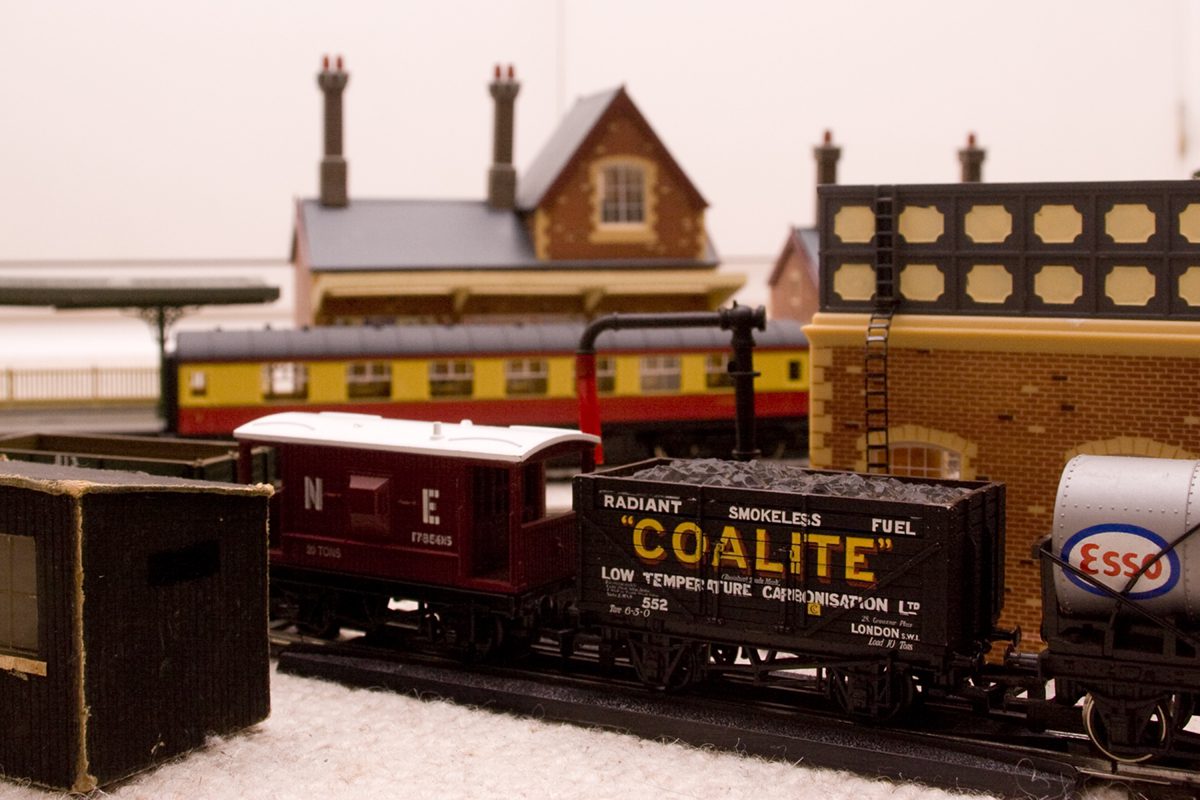
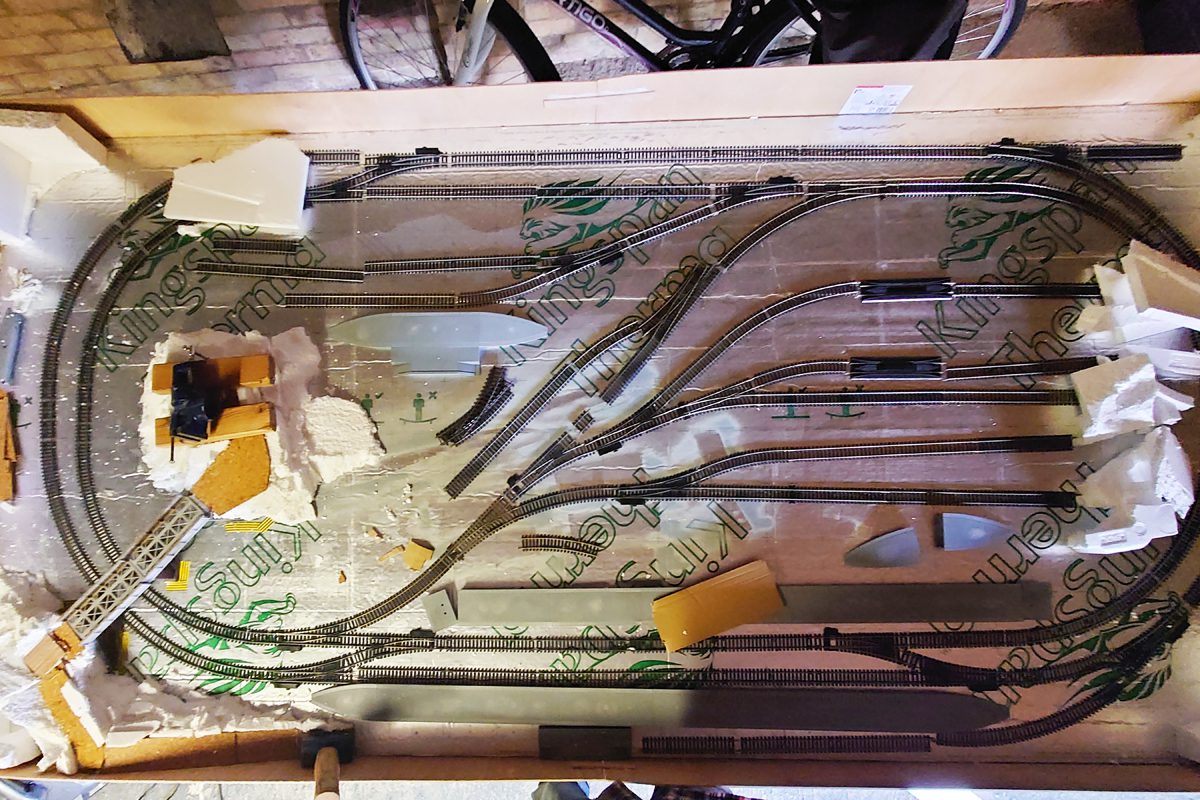
When I started to lay a track bed (rolls of Javis fine granite) I realised that I was being drawn down a rabbit hole. How could I lay black plastic track onto a new gravel bed without it looking naff? Paint each section of track by hand and add some ballast of course. How can the banks and hill be left bare? Add trees, static grass, bridgework and a blocked up tunnel entrance. What is the hill for? A radio mast, control room and connecting access road, naturally. And so it went on. Adding discarded and rusted pieces of track to the side of the mainline, a second engine shed for diesel locos, a special siding just to deal with oil wagons and one for the mail coaches. I was out of control.
-
- Hand painting track to make it blend in better.
Scrap yard
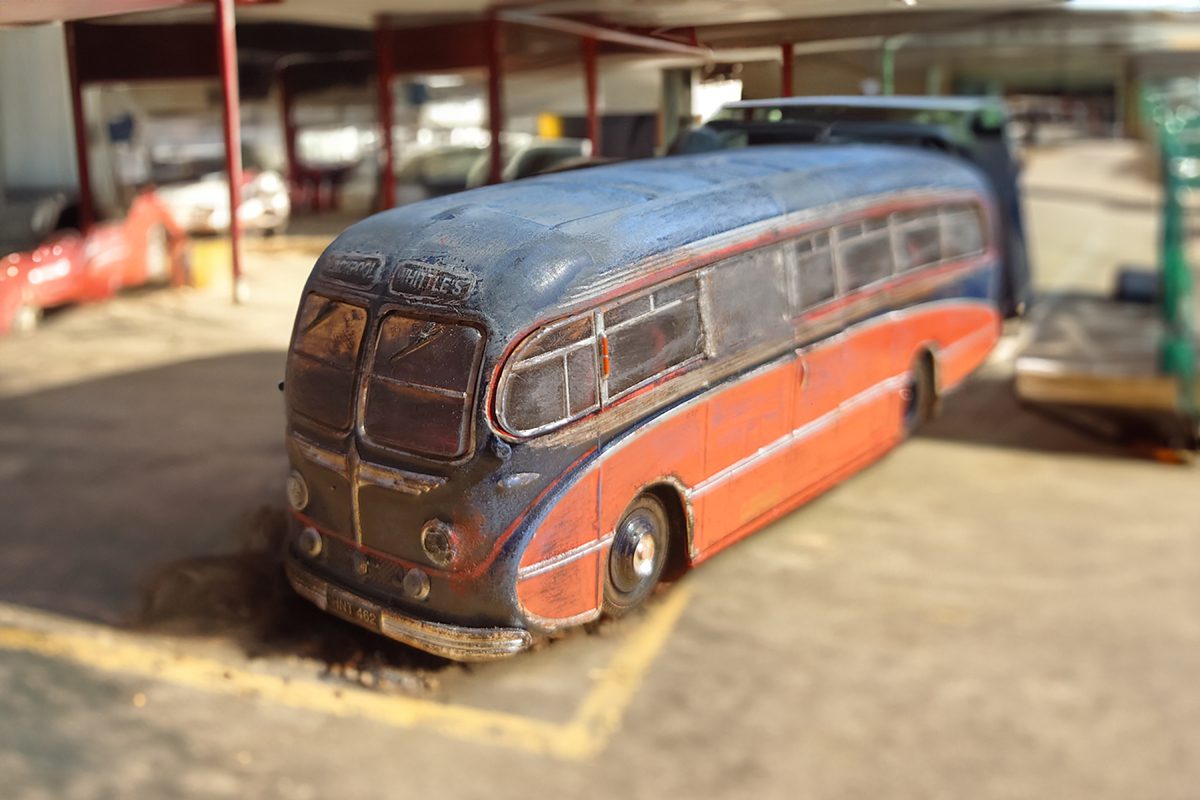
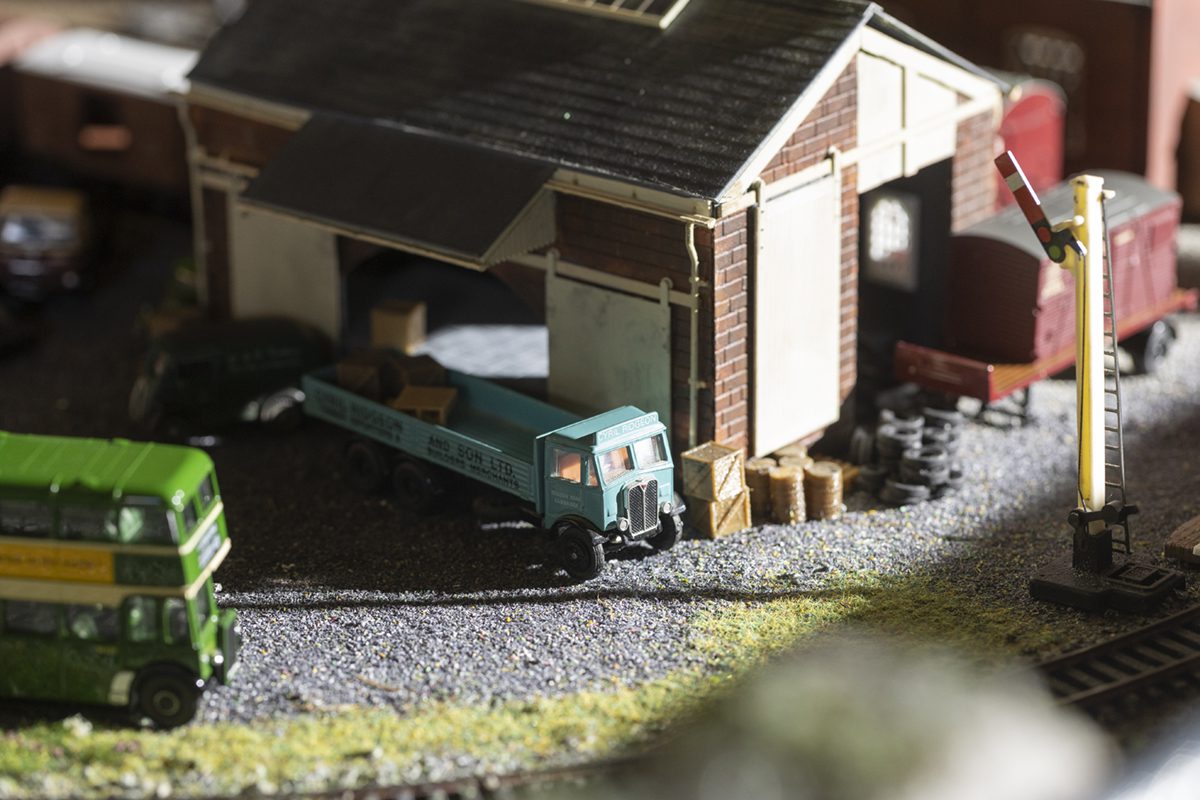
As the ideas started to grow that this could become a more substantial layout, this extended to a scrap yard somewhere amongst the goods yard. For this I wanted to include a non-runner coach or bus, old telephones boxes and lots of tyres. The bus was a not strictly to scale Atlas 1/72 Burlingham Seagull, J T Whittle (destination, Blackpool). By the time I had finished with it, the bus had peeling paintwork and two of its windows boarded up.

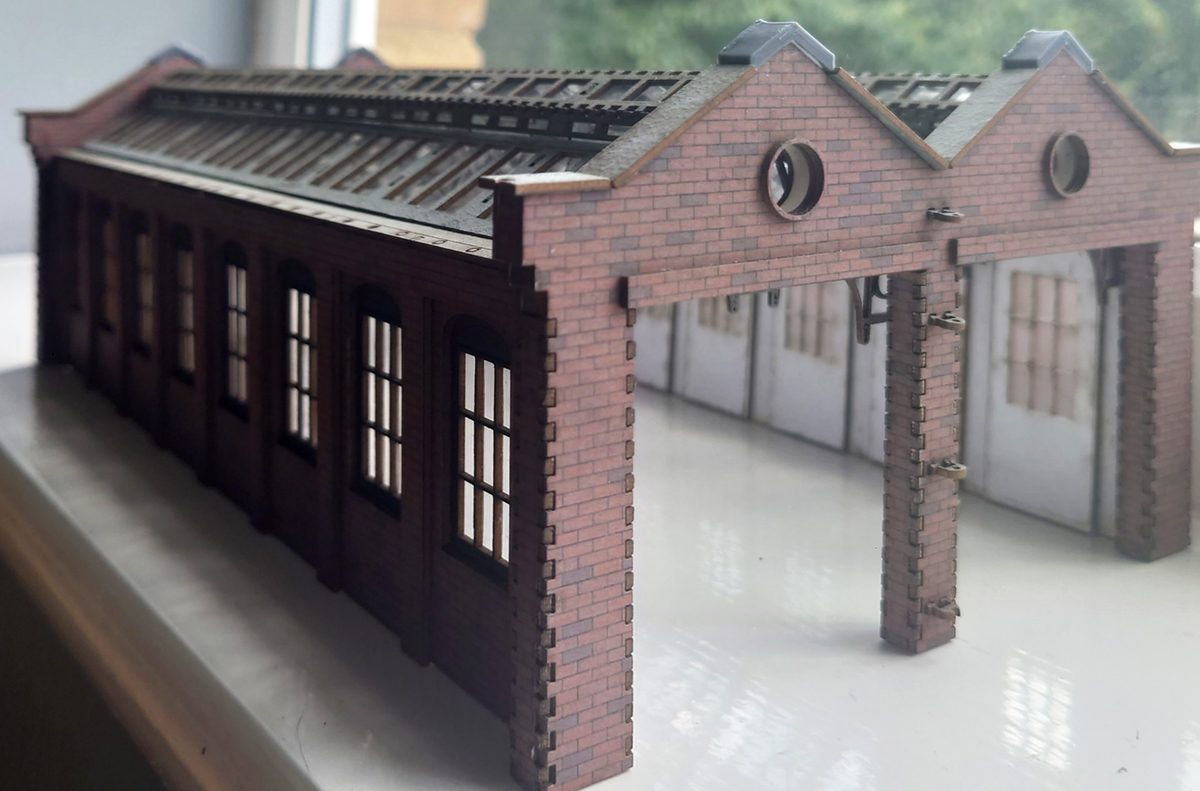
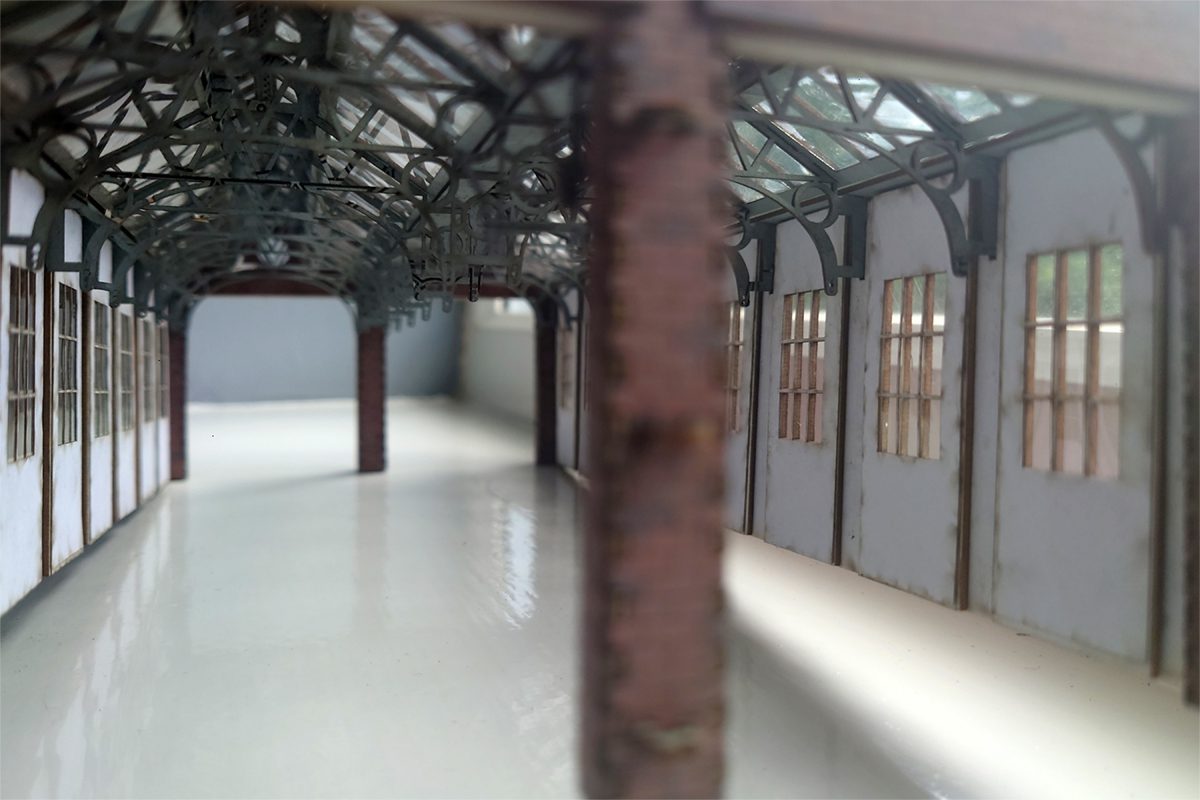
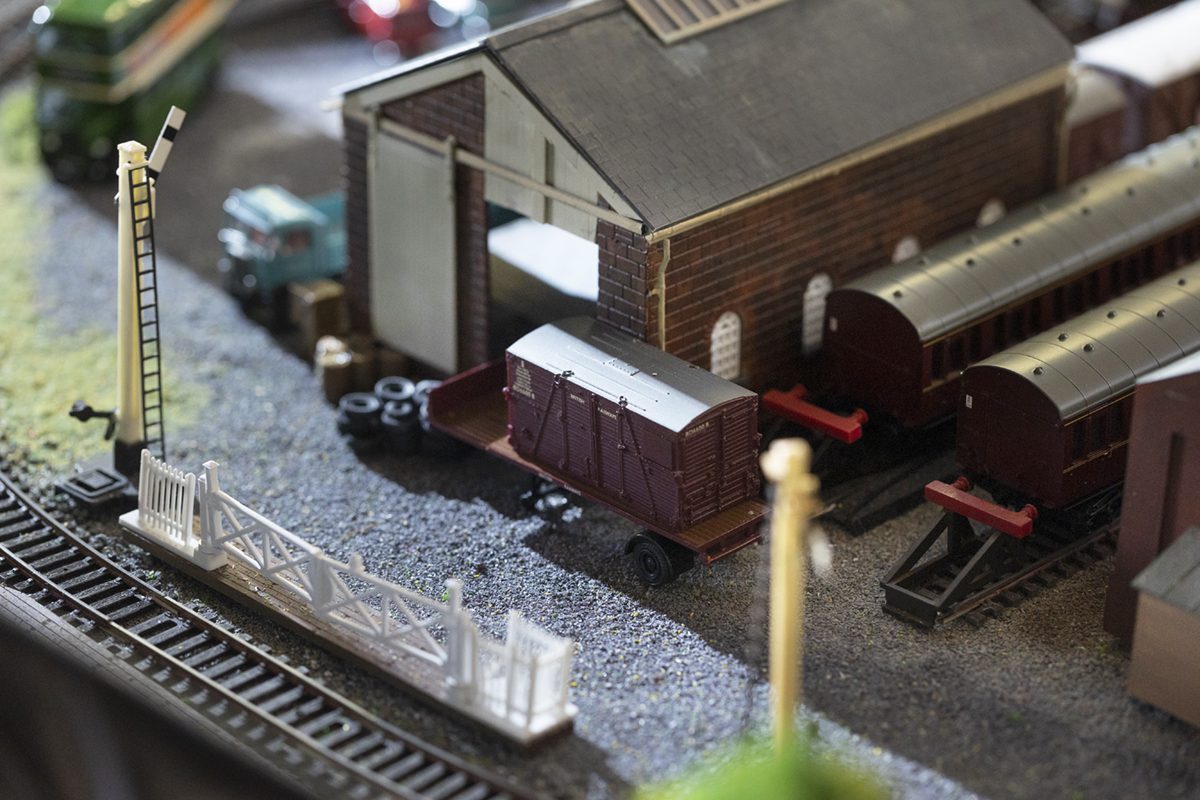
Engine Sheds and goods shed.
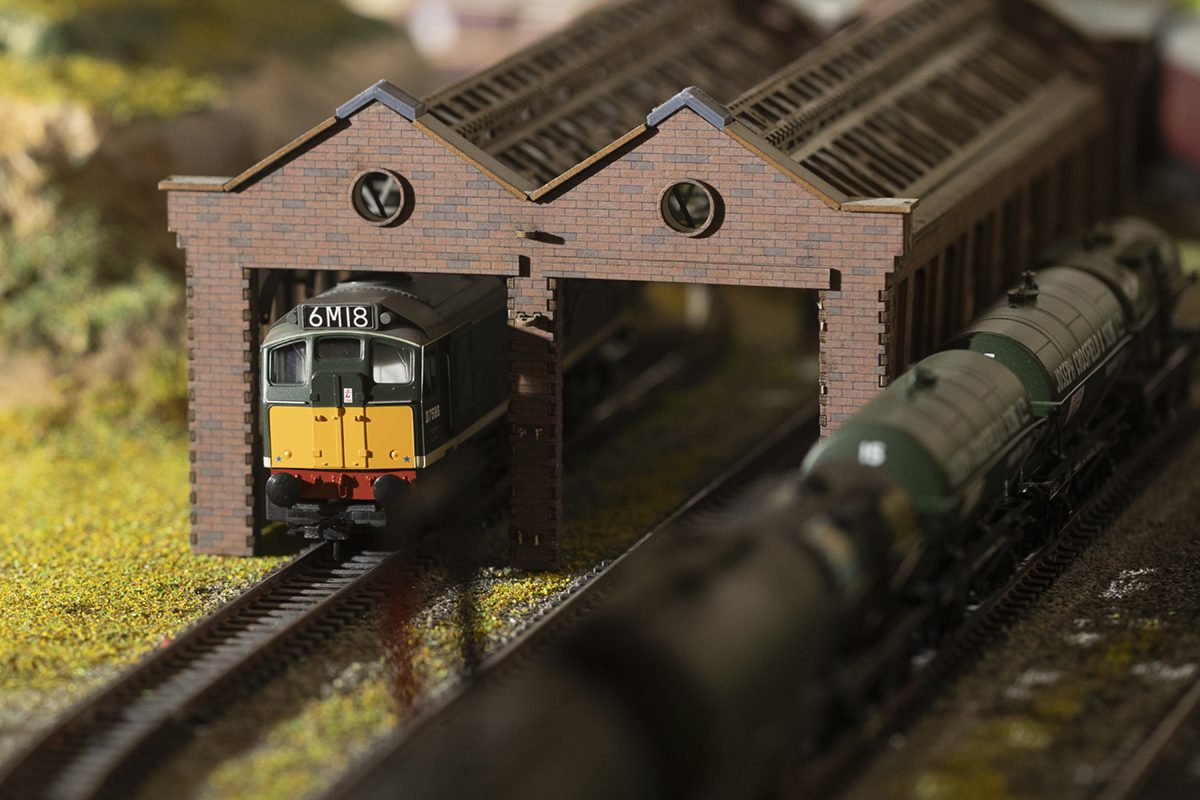
I never liked the Hornby engine and goods sheds (the were pretty much the same design just with different roof configurations and side wall panels, so decided to buy in something new.
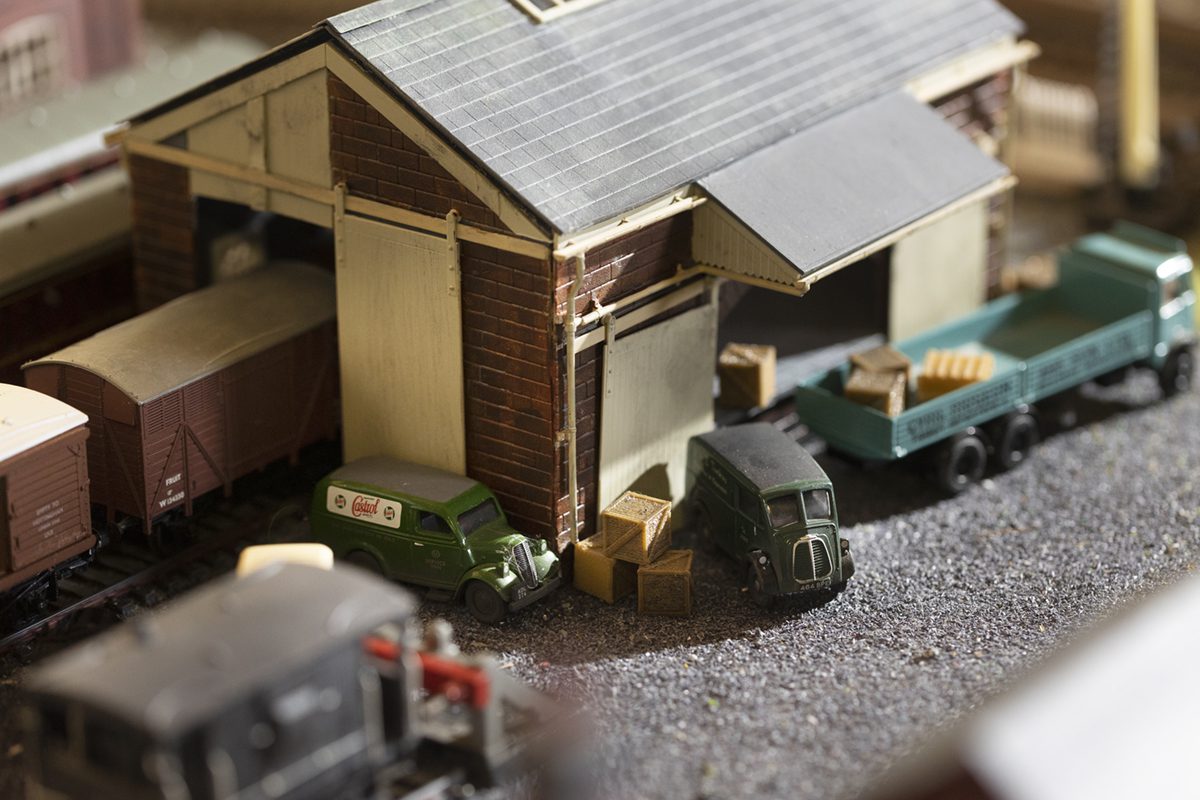
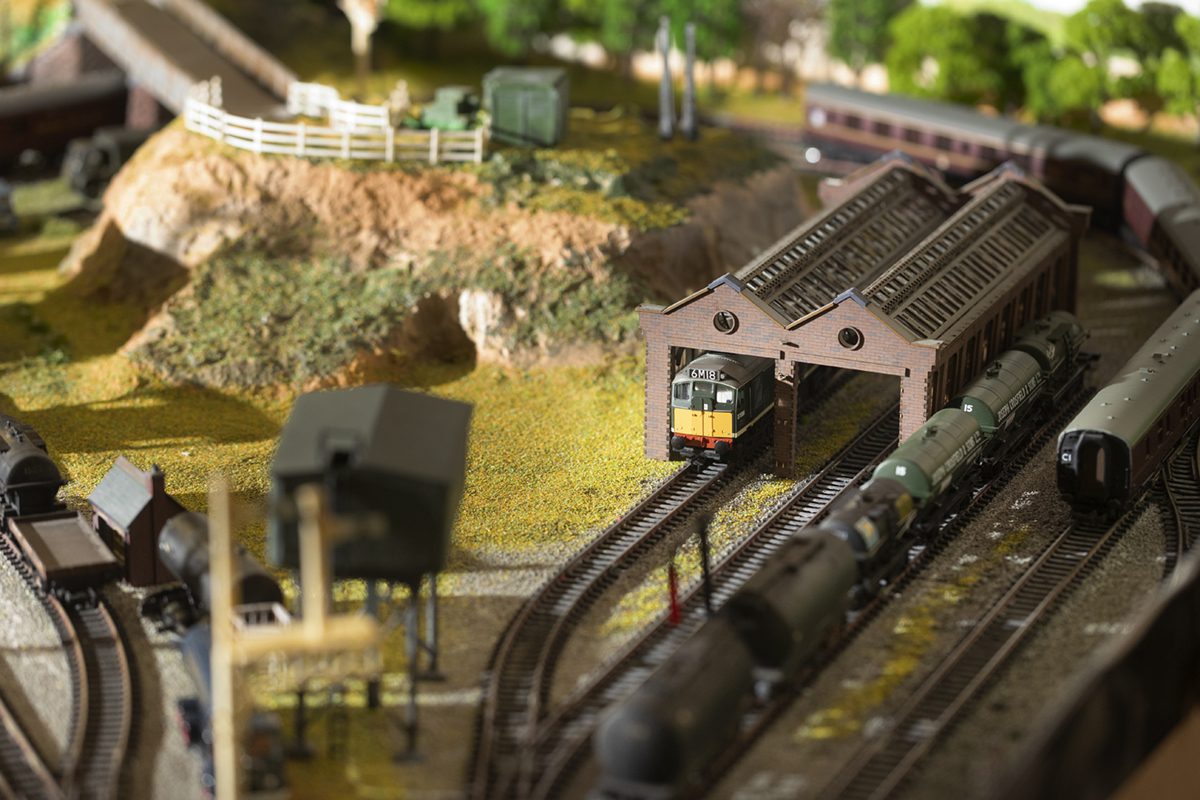
The first engine shed (for the diesels – more on this later -) was a double road balsa wood kit made by Modelux. It was the roof design that caught my attention and although a bit tricky to construct, it was worth it. I added a second shed for the steam engines was a rather distressed Dapol kit that I painted and weathered. The goods shed was a second-hand scratch build kit that I painted and weathered.
Locos and rolling stock
Now that I was committed to a bit more realism (or as close as I could get to it) it was time to say farewell to the locos and rolling stock that I had owned as child. The Mainline 4-6-4 rebuilt Royal Scot (“Illustrious”) and the Hornby 2-6-2 Prairie looked a little bit plasticky and not in keeping with the grime of this layout. I had a very particular vision for this time period – the end of the steam age, the running down of some of the older infrastructure and the introduction of the diesel engines.
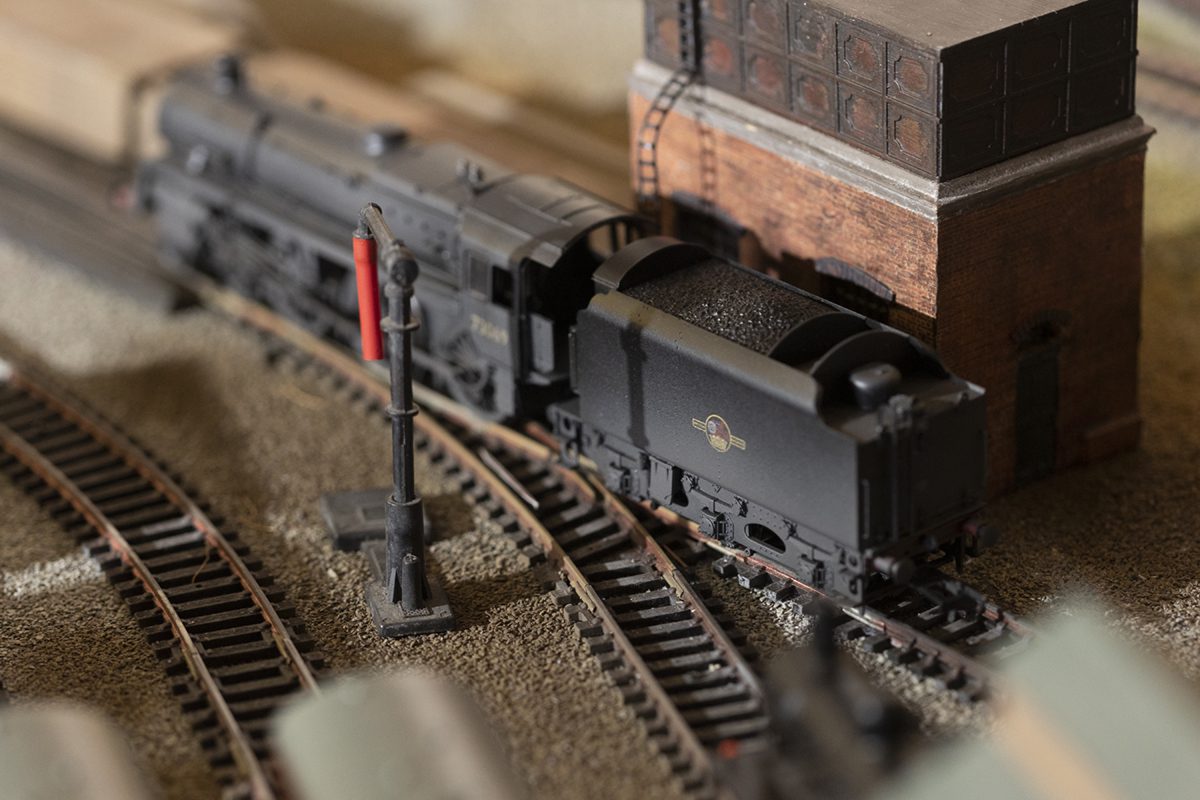
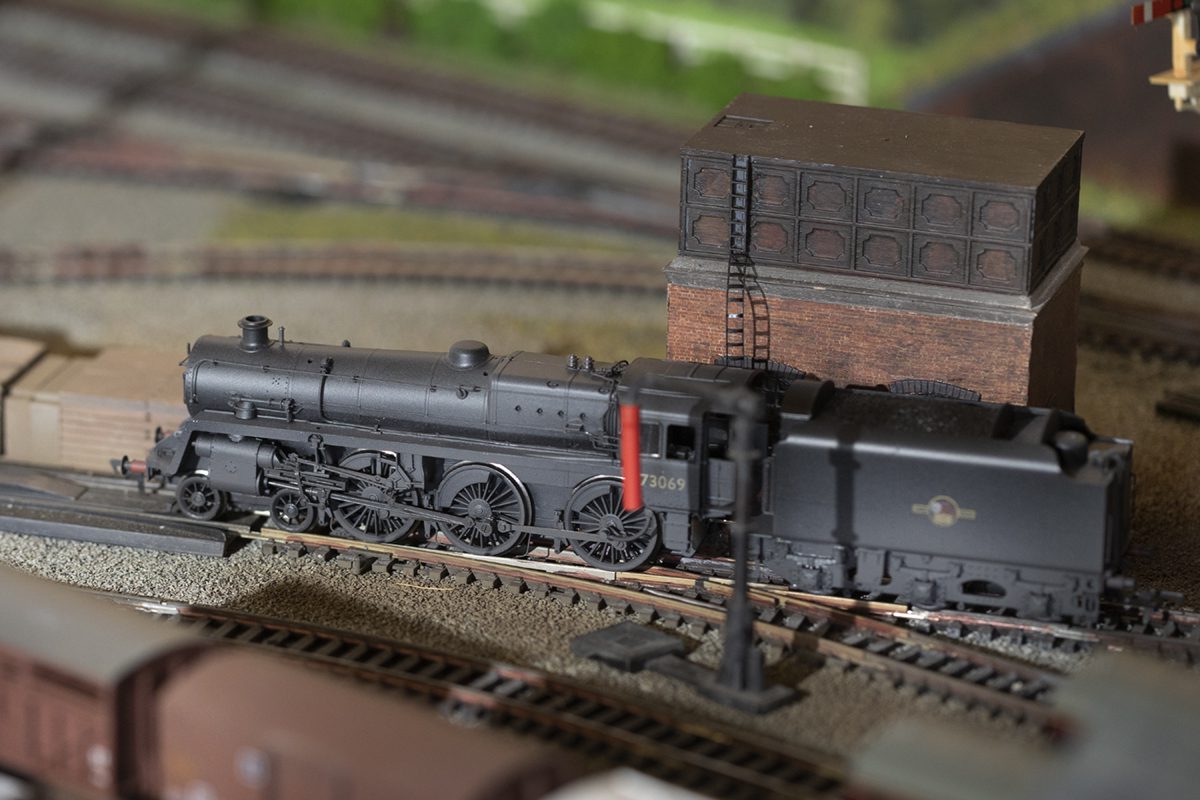
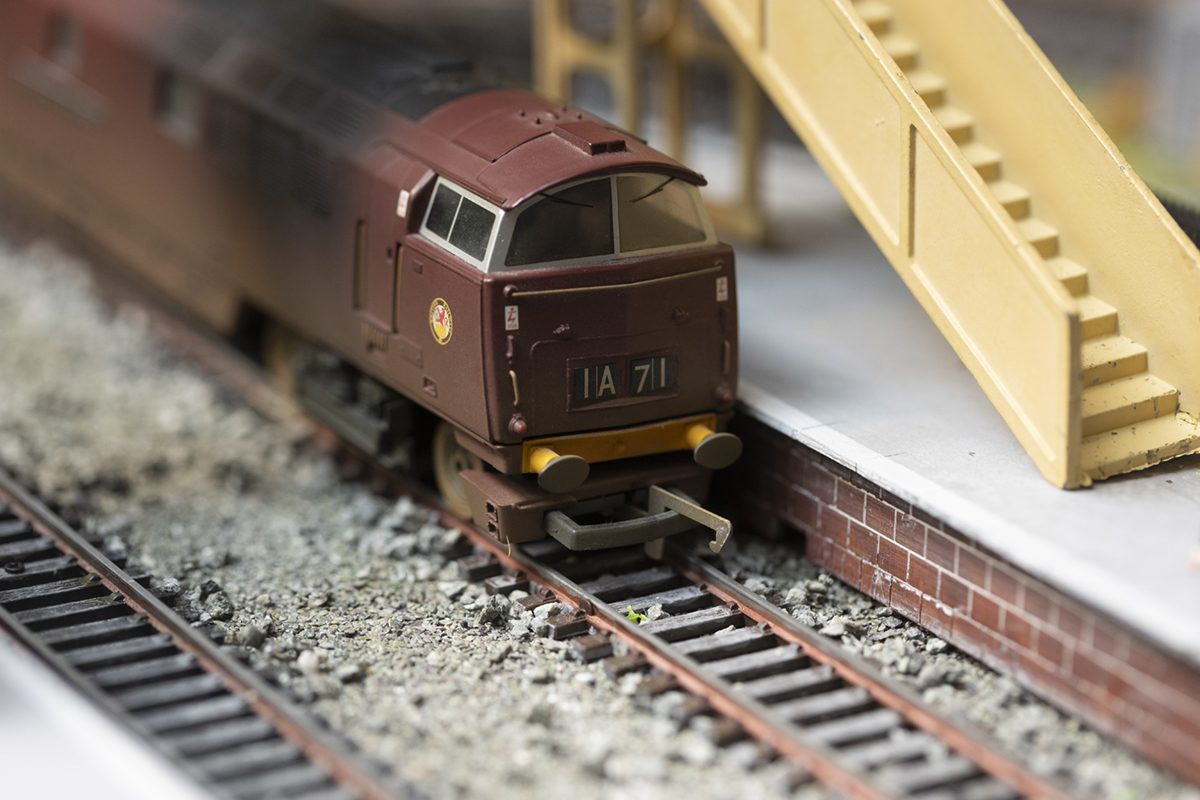
I added: a Bachmann Standard Class 5MT 73069 Black BRC1 Tender; Bachmann Class 3F Jinty 0606 tank; a Hornby Class 52 1009 Western Invader; and a Hornby R2121 BR Class 25 BoBo Diesel. This would be in keeping with the types of traffic passing through a junction between the Wirral and Chester in the mid to late 1960s.
The Class 52 has been introduced in 1962 to run passenger services between London Paddington, Shrewsbury, Chester and Birkenhead. But a Class 52 could also be used for pulling freight. The Class 5MT would have operated passenger services between Birmingham and Holyhead via Chester but also Chester to Birkenhead. Once the diesel engines had taken over passenger routes the class 5 would have been used for pulling trains of freight wagons. The freight wagons in my layout include oil and chemicals for Crossfields in Warrington.
The BR Class 25 diesels operated on the London-Midland lines in the mid -1960s but also on freight duties between Warrington and Shrewsbury.
The Class 3F Jinty worked as a shunter or on small passenger services (suburban coach stock) anywhere between Birkenhead, Chester and Shrewsbury.

Other additions
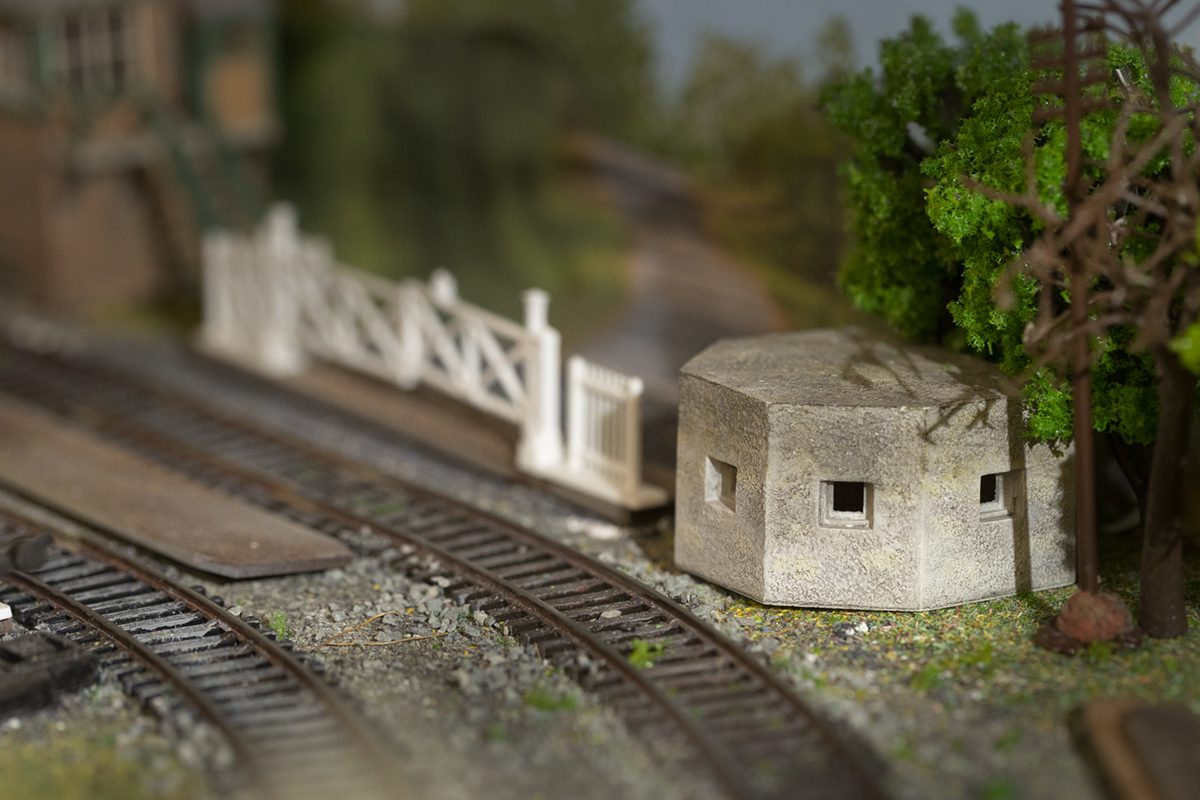
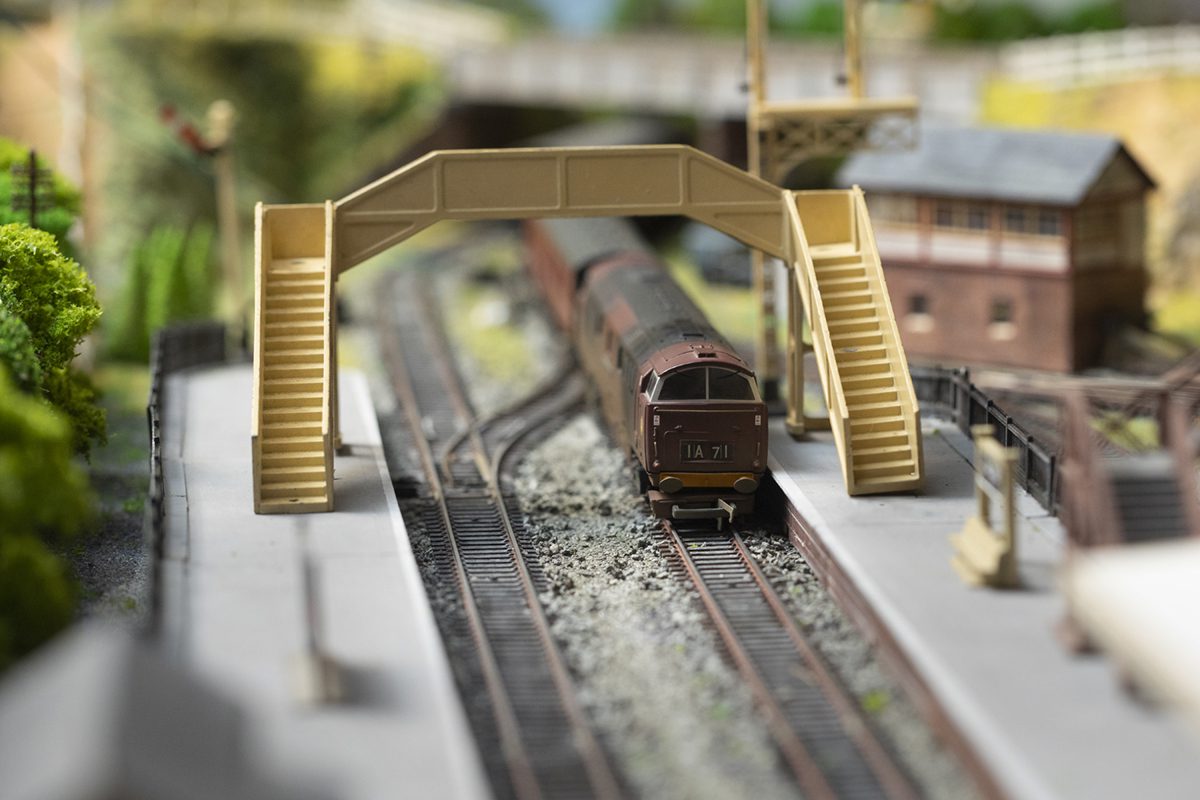
The station and junction was large enough to have had a bus service, so I added a Chester Saltney bus and a Crosville Llandudo bus. I also added some passenger cars, freight lorries and small vans. The signage was a mix of old metal Hornby Dublo but with period posters printed off and glued on. More track and points inevitably meant more signals. A second signal box was installed at a level crossing (Bachmann Scenecraft) together with a pill box left over from WW2. The extended sidings were served by the same signal box as the station and a second water tower was installed next to the larger engine shed. Finally two footbridges were added – a metal Hornby Dublo and a Dapol kit.